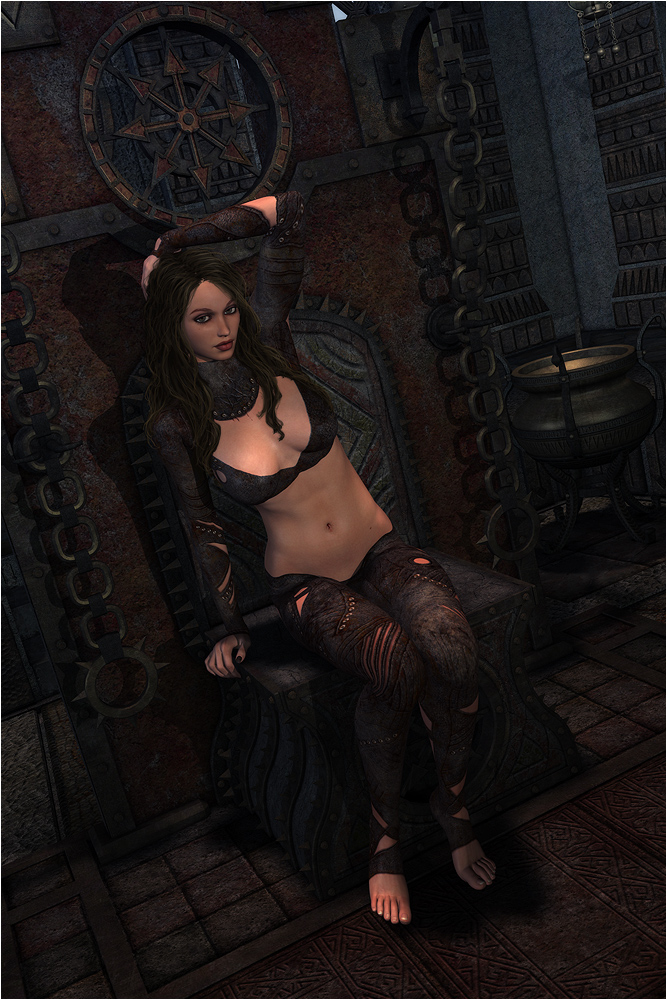
Before I start. This is as always just my personal way of doing things. I'm sure you can get the same result in several different ways. This time to make it a bit easy on myself I started out with one of Danie & Marforno's scenes, the second pz3 from their Dawnbreaker pack(slightly modified lighting.. Changed tone and position of the light in front of the character). The pose and axe are from their Ella's quest pack. The clothes worn is a mix or Xurge's Elven armor and AlfaseeD's Earthbreaker outfit. The character is a mix of Dakota by PDesign and Tanith by Thorne and Sarsa. The male character is Buddy by Mec3D. I also use a product called Xanna for most of my images.. it's a set of deformers that works great with all clothing letting me make more curvy bodies and still having clothes that fit :) I think that's all of it.

These are the render settings I use for pretty much all my images. I always render around 3500 - 2400 at 300 dpi .
Ok, lets start the postwork.

: Open the render in photoshop. Drag onto a background of your choice.
Test Image/adjustments/auto levels, and see if you like how it looks. if not, undo. Duplicate the render layer and blur the top one with Gaussian Blur around setting 10.

: Erase things you want in focus so that the normal render underneath shows thru. If you want some bits of the image not quite blurred and not quite sharp just lower the opacity on the eraser til around 35ish % Here I also add a gradient layer for colour adjustments. Usually I start out with one of the presets, the orange/purple one, but here I went for a more orange/brownish red one. I've also decided on a background by now.

: I personally think the guys head is too purple/pink so to correct that I sample some skincolour from our girl and paint over his face and neck.. set the layer mode to Hue and lower the opacity til I think it looks good.

: Sample the darkest haircolour on the mans hair and start painting a bit more of a scruffy look so our lady has some hair to grab on to.

: And next it's time for some blood. Here I just take a rather dark red and paint around the "cut".. fill in with some highlights to make it glisten with a little bit lighter red.. and after that I paint a bit of red on the axe (the dark red colour) and then I smudge it back and forth.. and then a little bit of the lighter red and smudge that back and forth aswell.
: When I paint hair I first fill the head with a base colour. Then I take the smudge tool, a hairbrush of my choice (this time one of Sarsa's hairbrushes) and set the smudgetool to darken at around 90%. Then I smudge out the shape of the hair.

: then I paint some single strands of hair with a 5 pixel round brush to make it a bit more messy.. then I do the same thing again with a 3 pixel brush.
: now it's time to do some more strands. Here I start with a colour that's a wee bit lighter than the base colour and paint lots of strands with brush poacity around 60-70%.. trying to have the same flow thru the whole hair. every now and then I switch to a slightly lighter colour than the one I used before.. start with a 3 pixel brush and after a while switch to a 2 pixel one.. and possibly even a 1 pixel one at the end.
: When I have what looks like a healthy head of quite dull and shineless hair, I flatten all the hair layers and duplicate the remaining one and set the layer mode to soft light. now it's gonna have a bit more shine. it might be a different colour than you want but you can change that by experimenting with the saturation slider on both the hair layers. I'm gonna go with a brownish colour this time.

: The hair still looks a little dull, so now we make a new layer and set it to multiply. And start painting with a 3-10 pixel brush in a brownish colour. This iswhere you paint in what areas should be shadowed. I usually blur this layer when I'm done painting on it.

: Next up is highlights. Here we make a new layer, set it to overlay and paint with a white colour where we want some highlights in the hair. I can do several layers of shadows and highlights depending on how it looks.

: When the hair is "done" I make a new layer under the hair layers and paint a soft shadow around the face from under the hair to frame the face.
: Depending on how the render looks, now I might add a bit of reflection in the eyes.. that I do with a 5pixel or 3 pixel round brush with a white colour.. just one little dot on each eye.

: one of the last steps I do before I flatten is to paint around the edge with a big (300 pixel) brush and a dark colour on a layer set to multiply.. then I gaussian blur it and fade the opacity til I think it looks ok. This time I ended up at 50% opacity.
: Time to flatten the image.. and then I try image/adjustments/auto contrast, auto levels and see if I like them.. if I do I keep it, if not I undo. Then I go to Image/adjustments/Selective colour and play around with the sliders til I get what I want. This time I ended up mostly using the red, yellow and neutral hues.

: At this point I save a big version of the image, then I resize it by lowering 300dpi to 72. And setting the height of the image to around 1000 pixels.
Then I hit sharpen and fade it til it looks ok and then I add my border and my "made by" text.. and that's it :) All done!

|
